Friday, November 22, 2024
How to Build a Wooden Sailboat on a Budget with Simple Plans

Building a Wooden Sailboat on a Budget: Your DIY Guide
Building a wooden sailboat can seem daunting, but it's actually a rewarding and achievable project for anyone with a passion for the water and a touch of DIY spirit. While it might not be as cheap as buying a used inflatable, building your own boat can be incredibly affordable if you're willing to put in the time and effort. This guide will walk you through the process of building a wooden sailboat on a budget, from choosing plans to launching your very own creation.
Choosing Your Sailboat Plans
The first step is to select plans that fit your skill level, budget, and desired size and type of boat. There are countless resources available online and in libraries offering free or affordable plans for small sailboats. Some popular options include:
- Simple dinghies: These are ideal for beginners and are relatively inexpensive to build. They can be made from plywood or stitch-and-glue construction, which is faster and easier than traditional planking.
- Small sailing skiffs: These offer more stability and can be used for longer outings. They often use traditional planking methods but are still manageable for DIYers with some woodworking experience.
- Day sailers: These are slightly larger and more complex, but they provide a rewarding challenge and allow for longer adventures.
When selecting plans, consider the following:
- Construction method: Some plans require traditional planking, while others use stitch-and-glue techniques or plywood construction. Stitch-and-glue is generally considered easier and faster for beginners.
- Material requirements: Look at the types and quantities of wood needed, and factor in the cost of these materials when budgeting.
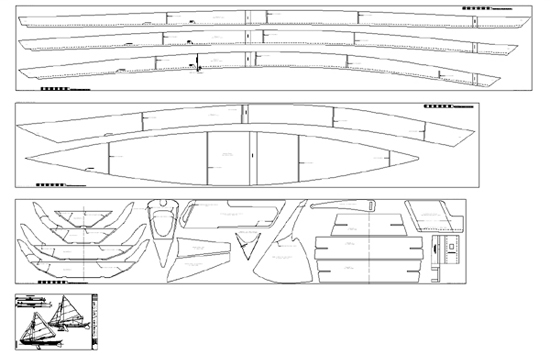
- Detailed instructions: Ensure the plans provide clear instructions, diagrams, and materials lists to make construction easier.
Gathering Materials and Tools
Once you've chosen your plans, it's time to gather the necessary materials and tools. Here's a basic list:
- Wood: This is the most significant expense, so choose wisely. You can find affordable options at lumberyards, wood recycling centers, or even online.
- Epoxy resin and hardener: Used for bonding wood and creating a waterproof seal.
- Fiberglass cloth: Used to reinforce the hull and provide additional strength.
- Paint: Choose a marine-grade paint for durability and protection.
- Sails: You can purchase ready-made sails or consider having them custom-made.
- Hardware: This includes fittings like cleats, blocks, shackles, and other essential components for rigging and sailing.
For tools, you'll need the basics for woodworking, including:
- Saw: A circular saw, jigsaw, or table saw will be essential.
- Sanding tools: An orbital sander, sandpaper, and sanding blocks are crucial for creating smooth surfaces.
- Drill: A cordless drill with various drill bits is essential for assembling the boat.
- Clamps: You'll need several clamps for holding pieces together during construction.
- Measuring tools: A tape measure, ruler, and protractor are essential for accurate measurements.
While it might seem like a lot of tools, many can be borrowed from friends, rented from hardware stores, or found at garage sales.
Building the Hull
The construction process will vary depending on the chosen plans. Here are the general steps for building a simple stitch-and-glue dinghy:
1. Cutting and Shaping the Hull Panels
Using your plans as a guide, carefully cut the plywood panels that make up the hull using a jigsaw or circular saw. Shape the panels using sanding tools and a router if needed.
2. Stiching the Panels Together
Use stitch-and-glue techniques to temporarily hold the panels together. This involves drilling holes along the edges of the panels and using wire or rope to tie them together. The stitching will later be removed when the epoxy cures.
3. Gluing and Reinforcing the Hull
Apply epoxy resin to the edges of the panels and then clamp them tightly together. Allow the epoxy to cure completely before removing the clamps. Then, reinforce the joints with fiberglass cloth and more epoxy. Be sure to follow the instructions on the epoxy and fiberglass products for best results.
4. Finishing the Hull
Once the epoxy and fiberglass have cured, sand the hull smooth. Apply primer and then several coats of marine-grade paint for protection and aesthetics.
Constructing the Deck and Other Components
Once the hull is complete, you can start building the deck, which will likely involve similar techniques as the hull construction. Refer to your plans for specific instructions. Other components, like the seats, rudders, and mast, will also need to be constructed or purchased according to your plans.
Rigging the Sailboat
Rigging your sailboat is a crucial step that involves setting up the sails, mast, and other hardware. The process will vary depending on your boat's design and rigging plan. It's essential to consult your plans and, if needed, seek guidance from experienced sailors.
Launching and Sailing Your DIY Sailboat
Once your sailboat is fully constructed and rigged, you can launch it! Before launching, do a thorough inspection to ensure everything is secure. Consider taking a short test sail in calm waters first to familiarize yourself with your boat's handling. Remember, even with a DIY boat, always prioritize safety and follow all relevant boating regulations.
Commonly Asked Questions
1. How much does it cost to build a wooden sailboat?
The cost of building a wooden sailboat varies greatly depending on the size and complexity of the boat and the quality of materials used. Simple dinghies can be built for under $500, while larger day sailers can cost several thousand dollars. Look for deals on materials, and consider using reclaimed wood whenever possible.
2. How long does it take to build a wooden sailboat?
The time it takes to build a sailboat depends on your skill level, the complexity of the design, and how much time you can dedicate to the project. A simple dinghy can be built in a few weeks, while a larger sailboat could take several months or even years.
3. Do I need any woodworking experience to build a sailboat?
While some woodworking experience is helpful, it's not essential for building a simple sailboat. There are plans specifically designed for beginners using easier construction methods like stitch-and-glue. Start with a small project and gradually increase complexity as you gain experience.
4. Where can I find more resources and information on building sailboats?
There are many online and offline resources available for boat builders. Check out forums, websites, and books dedicated to amateur boat building. Consider joining a local boat building club or workshop for additional support and guidance.
Building your own wooden sailboat is a rewarding journey that combines creativity, craftsmanship, and a love for the water. With careful planning, patience, and a willingness to learn, you can build a beautiful and functional boat that will bring you years of enjoyment on the open seas.

Powerboat Plans for Creating a Light, Easy-to-Store Boat
Building a Light and Easy-to-Store Powerboat: A Guide for DIY Enthusiasts
So, you're dreaming of cruising the open waters, but don't have the space for a massive boat? Or maybe you're just looking for a fun project that won't break the bank? Building a light and easy-to-store powerboat could be your perfect solution! This article will guide you through the process, from planning to construction, equipping you with the knowledge and inspiration to create your dream craft.
Choosing the Right Design
The first step is to choose a design that suits your needs and skills. A light and easy-to-store boat requires a design that prioritizes portability and simplicity. Here are some popular options to consider:
Inflatable Boats:
These are incredibly portable, deflating to a compact size for storage. They come in various sizes and configurations, offering great versatility. Just be mindful of their potential for damage from punctures.
Folding Boats:
These boats fold down into a smaller package, perfect for smaller storage spaces. While not as compact as inflatables, they offer a sturdier and more rigid structure.
Lightweight Dinghies:
Made from lightweight materials like fiberglass or aluminum, these dinghies are relatively small, making them easy to handle and store. They provide a great entry point into powerboating.
Materials: Light and Durable
Choosing the right materials is crucial for a boat that's both light and durable. Here's a breakdown of popular choices:
Fiberglass:
A classic choice for boat building, fiberglass offers excellent strength-to-weight ratio and durability. However, it requires some expertise in working with resin and glass fibers.
Aluminum:
Aluminum is lightweight, corrosion-resistant, and relatively easy to work with. It's a popular choice for dinghies and other small craft.
Polyethylene:
Polyethylene is a durable and impact-resistant material often used for inflatable boats. It's also relatively inexpensive, making it a budget-friendly option.
Powering Your Boat
Once you've got your design and materials sorted, it's time to think about power. Here are some things to consider:
Outboard Motors:
Outboard motors are the most popular choice for small boats. They're compact, versatile, and easy to install. Choose an outboard motor that's appropriately sized for your boat.
Electric Motors:
Electric motors offer a quiet and eco-friendly alternative to gasoline engines. They're becoming increasingly popular, especially for smaller boats. Just be mindful of battery life and charging requirements.
Building Your Boat
Now comes the exciting part: construction. Whether you're working with fiberglass, aluminum, or another material, here are some key steps:
1. Planning and Preparation:
Start by carefully reviewing your chosen plans. Gather all necessary tools and materials. Ensure your work area is safe and well-ventilated.
2. Cutting and Shaping:
Cut the materials to size and shape them according to the plans. Use precision tools for accurate measurements. Seek help if needed.
3. Assembling the Hull:
Follow the instructions carefully to assemble the hull. Use appropriate adhesives and fasteners. Make sure all connections are secure.
4. Adding the Deck and Features:
Once the hull is complete, attach the deck and any other features, such as seats, storage compartments, and rigging.
5. Finishing Touches:
Sand, paint, and varnish your boat to protect it and give it a polished look. Consider adding personal touches and embellishments.
Safety First
Always remember that safety is paramount when operating a powerboat. Here are some essential tips:
Commonly Asked Questions
How much does it cost to build a small powerboat?
The cost of building a powerboat varies significantly based on design, materials, and engine choice. A simple, lightweight boat can be built for a few hundred dollars, while more complex designs may cost several thousand. It's always wise to budget carefully and factor in the costs of tools, materials, and potential unexpected expenses.
What are the legal requirements for operating a powerboat?
Legal requirements vary by region. It's crucial to check with your local boating authorities to understand the necessary licensing, registration, and safety regulations. You may need to complete a boating safety course and obtain a boating license before operating your boat.
How do I know if I'm skilled enough to build a boat?
Building a boat requires patience, attention to detail, and a basic understanding of woodworking or metalworking skills. If you're comfortable with hand tools and have a knack for working with your hands, you're likely on the right track. Remember, there are resources and tutorials available to help you along the way.
Building a light and easy-to-store powerboat is an exciting and rewarding project. With careful planning, the right materials, and a touch of DIY spirit, you can create a vessel that will provide endless hours of enjoyment on the water. Remember, safety should always be your top priority. Enjoy the journey and safe travels!
How to Build a Wooden Canoe for Beginners: The Complete Process

Building a Wooden Canoe for Beginners: The Complete Process
Constructing a wooden canoe is a rewarding and challenging endeavor. It's a journey that combines traditional craftsmanship with modern techniques, resulting in a beautiful and functional watercraft. This comprehensive guide will walk you through the entire process, empowering you to build your very own wooden canoe. From selecting materials to applying the finishing touches, we'll equip you with the knowledge and steps to embark on this exciting adventure.
Choosing Your Canoe Design
The first step is to select a canoe design that suits your needs and skill level. Consider the length, width, and capacity of the canoe. Research various plans available online or from reputable canoe builders. For beginners, a simple, classic design with straight lines and a shallow hull is often recommended. The design should also be accompanied by detailed plans, including the canoe's dimensions, framing, and construction techniques.
Gathering the Necessary Materials
Once you've chosen your design, gather the essential materials:
Wood
- Strips: Thin strips of wood, typically cedar or spruce, form the canoe's outer hull.
- Frames: These wooden ribs, often made from oak or ash, provide structural support.
- Stems: The bow and stern pieces are typically crafted from durable wood like oak.
- Keel: A longitudinal piece of wood running along the bottom of the canoe, adding strength and stability.
Other Materials
- Epoxy Resin: A strong adhesive used to bond the wood strips and create a watertight seal.
- Fiberglass Cloth: Used in conjunction with epoxy for additional strength and water resistance.
- Wood Filler: For filling any gaps or imperfections in the wood.
- Sandpaper: Essential for smoothing the wood and creating a smooth finish.
- Paint or Varnish: To protect the canoe's wood from the elements.
- Hardware: This includes seats, thwart, and other fittings.
Building the Canoe Frame
Start by building the canoe's frame. This involves carefully constructing the ribs, stems, and keel according to the plans. The frame provides the underlying structure that the wood strips will be attached to. Here are the steps involved:
- Cut the wood: Precisely cut the frame pieces using a saw and a measuring tape.
- Assemble the frame: Connect the ribs, stems, and keel using strong wooden dowels or screws.
- Check for alignment: Ensure all the frame pieces are square and aligned according to the plans.
Stripping the Hull
Stripping the hull involves attaching thin wood strips to the frame, forming the canoe's exterior. This is a meticulous process requiring patience and precision. It typically involves the following steps:
- Plank the hull: Begin by attaching the first few planks to the frame using clamps and epoxy. These planks act as a foundation for the rest of the hull.
- Continue stripping: Gradually add more planks, ensuring they're evenly spaced and overlap slightly. This creates a smooth and watertight hull.
- Shape the hull: As you add planks, use a planing tool to shape the hull according to the canoe's design. This process requires careful attention and a steady hand.
- Secure the planks: Once the hull is stripped, reinforce the planks with epoxy and fiberglass cloth for added strength and water resistance.
Finishing Touches
The final steps involve applying the finishing touches to your canoe. This includes sanding, filling gaps, and painting or varnishing. Follow these steps for a beautiful and long-lasting canoe:
- Sanding: Thoroughly sand the hull to create a smooth surface. Start with coarse-grit sandpaper and gradually work your way to finer grits for a smooth and even finish.
- Filling gaps: Fill any gaps or imperfections in the wood with wood filler and smooth it out with sandpaper.
- Painting or varnishing: Choose a suitable paint or varnish that protects the wood from the elements. Apply several coats for maximum protection.
- Hardware installation: Install the seats, thwart, and other fittings according to the plans. Ensure all hardware is securely fastened to the canoe.
Launching Your New Canoe
After applying the finishing touches, your wooden canoe is ready for its maiden voyage. Launch it into a calm body of water and enjoy the fruits of your labor. As you paddle your handcrafted masterpiece, take pride in the journey that led you to this moment. Remember to follow proper safety procedures and enjoy the serenity and beauty of being on the water.
Building a wooden canoe is a journey of discovery, requiring patience, skill, and a passion for craftsmanship. This comprehensive guide has equipped you with the knowledge and steps to embark on this rewarding project. Now, gather your tools and materials, and let your canoe-building adventure begin!
Wooden Kayak Plans for Smooth and Easy Construction

Wooden Kayak Plans for Smooth and Easy Construction
Constructing a wooden kayak can be a rewarding undertaking, yielding a beautiful and uniquely personal watercraft. While the process may seem daunting, careful planning and the selection of appropriate plans significantly simplify the build. This comprehensive guide presents a detailed approach to selecting and utilizing plans for a smooth and efficient construction process, focusing on designs optimized for ease of assembly and readily available materials.
Choosing the Right Kayak Plans
The foundation of any successful kayak build lies in selecting suitable plans. Numerous plans are available, ranging from intricate designs requiring advanced woodworking skills to simpler plans ideal for beginners. Factors to consider when choosing include:
Skill Level
Beginner-friendly plans typically feature straightforward construction techniques, minimizing complex joinery and utilizing readily available materials. They often employ simpler hull shapes and robust construction methods that tolerate minor imperfections. Intermediate and advanced plans offer greater design flexibility and often incorporate more sophisticated features, demanding higher levels of precision and woodworking expertise. Honesty in self-assessment of your skill level is crucial; attempting a complex design as a beginner can lead to frustration and a potentially unsuccessful build.
Kayak Type and Size
Kayak designs vary widely. Recreational kayaks are generally shorter and wider, offering greater stability but potentially less speed. Touring kayaks are longer and narrower, providing better tracking and speed but requiring more skill to maintain stability. Whitewater kayaks are designed for navigating rapids and feature robust construction and specialized features. Carefully consider your intended use and choose plans that align with your needs. Your body size and weight are also critical factors; plans usually specify a suitable weight range.
Materials and Availability
Some plans specify particular wood types, which may be difficult or expensive to source in your region. Opting for plans that utilize readily available and affordable lumber will streamline the process and reduce costs. Consider the readily available lumber in your area and choose plans that match. Commonly used woods include cedar, redwood, and mahogany, each offering unique properties in terms of strength, weight, and resistance to rot.
Plan Format and Detail
High-quality plans provide detailed instructions, clear diagrams, and accurate measurements. Look for plans that include comprehensive material lists, step-by-step instructions with accompanying illustrations, and templates for crucial components. Ambiguous instructions or poorly drawn diagrams can lead to significant setbacks during construction. Consider purchasing plans from reputable sources with a proven track record of producing successful builds.
Essential Tools and Materials
Before commencing construction, ensure you have all necessary tools and materials readily available. This will prevent interruptions and maintain the flow of the project.
Tools
A comprehensive list of tools includes, but is not limited to:
- Hand saws (various types)
- Jigsaw or band saw
- Chisels
- Planes
- Clamps (various sizes)
- Measuring tools (tape measure, rulers, squares)
- Drill and drill bits
- Screwdrivers
- Sandpaper (various grits)
- Safety glasses and hearing protection
Materials
The specific materials will depend on the chosen plans, but generally include:
- Lumber (specific type and dimensions as per plans)
- Epoxy resin and hardener
- Fiberglass cloth
- Wood filler
- Wood glue
- Marine-grade varnish or paint
- Deck hardware (if applicable)
Construction Stages: A Step-by-Step Guide
The specific construction steps will vary depending on the chosen plans; however, a general sequence typically includes:
1. Material Preparation
Begin by carefully reviewing the plans and ensuring you have all necessary materials. Accurately cut the lumber to the specified dimensions, paying close attention to detail. Properly prepare the wood surface by sanding to remove imperfections and ensure a smooth finish. Any necessary shaping or planing should be completed at this stage.
2. Hull Construction
This often involves assembling the kayak's hull sections. Common techniques include stitch-and-glue, where the planks are temporarily stitched together before being glued and reinforced with fiberglass, or plank-on-frame construction, where the planks are attached to a framework. Careful adherence to the plans is essential to maintain the integrity and shape of the hull. Accurate measurements and precise joining techniques are paramount during this phase.
3. Deck Construction
Once the hull is complete and cured, the deck can be constructed. This typically involves building the deck components separately and then carefully attaching them to the hull using appropriate joinery techniques and adhesives. Precise measurements and a high degree of accuracy are essential to ensure a watertight and aesthetically pleasing deck. Consider incorporating features like hatches for storage at this stage.
4. Finishing and Refinement
After the hull and deck are joined, any gaps or imperfections should be filled with wood filler and sanded smooth. Multiple coats of marine-grade varnish or paint will protect the wood from the elements and enhance the kayak's appearance. Install any necessary deck hardware, such as hatches, seat supports, and footrests, according to the plans.
5. Testing and Refinement
Before launching your newly constructed kayak, conduct a thorough inspection and ensure all components are securely attached and watertight. A test run in calm waters will allow you to evaluate the kayak's performance and identify any areas needing further adjustment or refinement. This is crucial for ensuring stability and safety during future use.
Safety Considerations
Kayak construction involves the use of sharp tools and potentially hazardous materials. Always prioritize safety by:
- Wearing appropriate safety glasses and hearing protection.
- Using tools correctly and carefully.
- Working in a well-ventilated area when using epoxy resin and other potentially harmful chemicals.
- Following all safety guidelines provided in the plans and relevant material safety data sheets.
Building a wooden kayak is a rewarding journey that combines craftsmanship, patience, and attention to detail. By carefully selecting appropriate plans, preparing thoroughly, and following the construction stages diligently, you can create a beautiful and functional watercraft that will provide years of enjoyment.
Build a Classic Wood Canoe with Free Downloadable Plans

Building Your Own Classic Wood Canoe: A Journey of Craftmanship
There's something truly magical about a classic wood canoe. The smooth, flowing lines, the warm scent of cedar, the gentle sway of the water as you glide across the lake - it's an experience that transcends mere transportation. It's a connection to nature, a testament to time-honored craftsmanship, and a source of endless adventure.
If you've ever dreamt of building your own canoe, now is the perfect time to turn that dream into reality. With the right resources and a touch of dedication, you can craft a beautiful and functional canoe that will be a cherished heirloom for generations to come.
Finding the Perfect Canoe Plans
The first step on your canoe-building journey is finding the perfect plans. The internet is a treasure trove of free and affordable canoe plans, but here are a few places to start your search:
- The WoodenBoat Magazine website: WoodenBoat is a renowned resource for boat builders, offering a variety of free plans, including some for classic canoes.
- The Chesapeake Light Craft website: Chesapeake Light Craft is known for its beautiful and well-documented boat plans, some of which are available for free download.
- The Duckworks Magazine website: Duckworks offers a mix of free and paid plans, with a focus on smaller boats, including canoes.
- Free plans websites: Search for "free canoe plans" on Google, and you'll find a variety of websites dedicated to offering downloadable plans for various canoe types.
When choosing your plans, consider the following:
- The size and type of canoe: Do you want a solo canoe, a tandem, or something in between? What kind of paddling style are you aiming for? Some plans are designed for flatwater paddling, while others are better suited for rough water or whitewater.
- The level of difficulty: Some plans are more beginner-friendly, while others are meant for experienced boat builders. Choose a plan that matches your skills and experience level.
- The available resources: Make sure you have access to the necessary tools and materials before committing to a particular plan. You can always adjust the design slightly to fit your resources and capabilities.
Gathering Your Tools and Materials
Once you've selected your plans, it's time to gather the tools and materials you'll need for the build. Here's a basic list:
- Wood: The most common wood for canoe building is cedar, but other options like spruce, pine, and mahogany are also suitable.
- Epoxy resin and hardener: Epoxy is used to seal the wood and provide strength and water resistance.
- Fiberglass cloth: Fiberglass cloth is used to reinforce the canoe hull.
- Wood glue: A high-quality waterproof wood glue is essential for bonding the wood parts.
- Hand tools: You'll need a variety of hand tools, including saws, planes, chisels, and a hammer.
- Power tools: A drill, a sander, and a router are helpful, but not strictly necessary.
- Measuring tools: A tape measure, a ruler, and a protractor are essential for accurate measurements.
- Safety gear: Always wear safety glasses and gloves when working with wood and tools.
You can find most of these materials at your local hardware store or lumberyard. Many canoe building supply stores also specialize in selling the specific materials and tools needed for this type of project.
Building the Canoe: A Step-by-Step Guide
Building a canoe is a journey that requires patience, precision, and a touch of artistry. Here's a general overview of the process, keeping in mind that each plan will have its own specific instructions and techniques.
Step 1: Preparing the Materials
Begin by cutting your wood to the dimensions specified in the plans. Pay close attention to the grain direction and make sure each piece is straight and free of knots. Then, carefully sand each piece to remove any rough edges or imperfections.
Step 2: Building the Frames
The canoe's frames provide the basic structure for the hull. These are typically made of shaped wooden pieces joined together to form a series of ribs that run the length of the canoe. Follow the plans precisely to ensure accurate spacing and curvature.
Step 3: Attaching the Planking
The planking is the thin, curved wood that forms the outer shell of the canoe. Each plank is carefully shaped and fitted to the frames, using wood glue and screws to secure them. This is a meticulous process requiring patience and precision.Step 4: Filling and Fairing
Once the planking is complete, you'll need to fill any gaps and smooth out any uneven surfaces. This involves using epoxy resin and a variety of fillers to create a smooth, watertight hull.Step 5: Glassing the Hull
To reinforce the canoe hull, you'll apply layers of fiberglass cloth to the epoxy-coated surface. This process involves laying down strips of fiberglass cloth, saturating them with resin, and smoothing out any wrinkles. It's important to follow the directions in your plans carefully, especially when it comes to the number of layers and the resin-to-cloth ratio.Step 6: Finishing the Canoe
Once the glassing is complete, it's time to sand the hull smooth and apply a final layer of epoxy to seal and protect the wood. You can then add finishing touches like paint, varnish, or even a traditional cedar oil finish.Step 7: Building the Seats, Thwarts, and Gunwales
The final step is to build the seats, thwarts (crossbars), and gunwales (the upper edge of the hull). These components are typically made of wood, and their construction involves techniques similar to those used for the frames and planking. Make sure to follow the plans closely to ensure the correct positioning and dimensions.Launching Your Masterpiece
After months of meticulous work, you're ready to launch your masterpiece. Take your time to admire the craftsmanship, the smooth lines, and the warm scent of the wood. The first paddle stroke will be a moment of pure joy, knowing that you built this beautiful and functional vessel with your own hands.
Commonly Asked Questions
How much does it cost to build a wooden canoe?
The cost of building a canoe will vary depending on the materials used, the size and design, and your own DIY skills. However, it's generally cheaper to build your own canoe than to buy one commercially.
How long does it take to build a canoe?
The time it takes to build a canoe depends on the complexity of the plan, your skill level, and the amount of time you can dedicate to the project. A simple canoe might take a few weeks to build, while a more elaborate one could take months or even years.
Do I need any special skills to build a canoe?
While canoe building does require some woodworking skills, it's not as daunting as it may seem. Many canoe plans are designed for beginners, and there are countless resources available to help you learn the techniques. Patience, precision, and a willingness to learn are key.
What are the advantages of building a wooden canoe?
There are many advantages to building a wooden canoe:
- Unique craftsmanship: You'll create a beautiful and unique vessel that you can proudly display and use for generations to come.
- Durability: Wooden canoes, when built properly, can last for decades, even a lifetime, with proper maintenance.
- A sense of accomplishment: There's a deep satisfaction in building something with your own hands, especially something as beautiful and functional as a canoe.
- Connection to nature: Working with wood and creating a vessel designed to move through water connects you to the natural world in a way that few other hobbies can.
Building a wooden canoe is a rewarding journey, offering a chance to learn new skills, connect with nature, and create a lasting legacy. So grab your tools, dive into the plans, and let the adventure begin!
Wooden Fishing Boat Plans for Easy-to-Build Watercraft

Wooden Fishing Boat Plans: Build Your Dream Watercraft
The allure of a handcrafted wooden fishing boat is undeniable. The smell of fresh-cut lumber, the rhythmic tap of hammer on wood, and the satisfaction of seeing your creation take shape on the water are experiences that truly connect you to the craft of boatbuilding. Fortunately, you don't need to be a seasoned shipwright to build your own fishing boat. With the right plans and a bit of dedication, even a beginner can bring their dream watercraft to life.
This article will guide you through the world of wooden fishing boat plans, providing you with everything you need to know to choose the right design, understand the materials, and navigate the construction process.
Choosing the Right Wooden Fishing Boat Plans
The first step to building your own fishing boat is choosing the right set of plans. Consider these factors:
Boat Size and Type
The size and type of boat you build will depend on your intended use. Will you be fishing solo or with a group? Do you plan to fish in calm waters or challenging open seas? Some popular wooden fishing boat styles include:
- Dinghy: Small, simple boats perfect for solo fishing or paddling around a lake.
- Skiff: Versatile boats suitable for both rowing and small motors, ideal for coastal fishing.
- Punt: Shallow-draft boats perfect for navigating shallow rivers and marshes.
- Dory: Durable, seaworthy boats capable of handling rough waters and capable of carrying larger loads.
Skill Level
Plan selection should also consider your boatbuilding experience. Beginner plans are typically designed with simplified construction techniques and detailed instructions, making them ideal for first-time builders. More advanced plans offer greater design complexity and require more experience.
Materials
Wooden fishing boat plans usually specify the types of wood required. Common choices include:
- Cedar: Lightweight and rot-resistant, ideal for small boats.
- Mahogany: Strong, beautiful, and resistant to decay, perfect for larger boats.
- Oak: Durable and heavy, great for building strong, sturdy boats.
Understanding Wooden Fishing Boat Plans
Wooden fishing boat plans are detailed blueprints that guide you through every step of the construction process. They typically include:
- Boat Dimensions: Overall length, beam (width), and depth.
- Hull Shape: Diagrams and templates for creating the boat's hull.
- Frames and Ribs: Details for building the boat's skeleton.
- Planking: Instructions for laying the wooden planks that form the boat's hull.
- Deck and Interior: Plans for building the deck, seating, and other interior features.
- Materials List: A comprehensive list of all the wood, hardware, and other materials you will need.
- Construction Instructions: Step-by-step instructions with diagrams and illustrations.
Constructing Your Wooden Fishing Boat
Building a wooden fishing boat is a rewarding journey. While it requires time and dedication, the process can be broken down into manageable steps:
- Gather Materials: Acquire all the materials needed, including wood, hardware, fasteners, and tools.
- Build the Frames: Construct the boat's skeleton by following the plans' instructions for framing and ribs.
- Plank the Hull: Carefully attach the wooden planks to the frames, creating the boat's hull.
- Construct the Deck and Interior: Follow the plans to build the deck, seating, and other interior features.
- Finishing Touches: Apply paint, varnish, or other finishes to protect and enhance your boat's appearance.
- Rigging and Equipment: Install any necessary rigging, such as oars or motor mounts, and add fishing gear.
Resources for Wooden Fishing Boat Plans
There are many excellent resources available for finding wooden fishing boat plans. You can explore:
- Online Retailers: Numerous online retailers specialize in boat plans, offering a wide variety of designs.
- Boatbuilding Books: Libraries and bookstores carry books dedicated to wooden boat construction, often including plans.
- Boatbuilding Associations: Organizations like the Wooden Boat Society offer resources, plans, and support for boat builders.
Building a wooden fishing boat from scratch is a challenging but rewarding undertaking. With the right plans, materials, and a commitment to the process, you can create a timeless, handcrafted watercraft that you will cherish for years to come.
Homemade Duck Boat Plans for Customization and Comfort

Build Your Dream Duck Boat: A Guide to Customizable Comfort
Imagine yourself gliding across a serene lake, the morning mist swirling around you, your trusty duck boat cutting through the water with ease. This dream can become a reality with a little DIY spirit and a set of detailed plans. This article will guide you through the process of crafting a custom duck boat that prioritizes comfort and functionality, catering to your specific needs and fishing style.
Designing Your Duck Boat
The first step in building your dream duck boat is to design it. This involves considering your intended use, the size and weight of your gear, and the overall comfort you desire. You'll need to make decisions regarding:
Hull Design
The hull of your duck boat will determine its stability, maneuverability, and overall performance. You can choose from various designs, including:
- V-hull: Provides stability in rough water and efficient ride.
- Modified V-hull: Offers a good balance between stability and maneuverability.
- Flat bottom: Ideal for shallow water and easy access to the shore.
Research each design and select the one that best suits your intended use and the water conditions you'll be navigating.
Size and Capacity
The size of your duck boat will depend on the number of anglers it will accommodate, the amount of gear you plan to carry, and the type of water you'll be fishing in. Consider the weight of your motor and the weight of any accessories you might add. Remember to factor in safety margins and adhere to the recommended weight capacity for your chosen materials.
Comfort Features
This is where you personalize your duck boat. Do you want high-back seats for extra support? Built-in storage compartments for gear? A rod holder system for easy access? Consider adding comfortable features that enhance your fishing experience and make it more enjoyable.
Gathering Materials and Tools
Once you have your design finalized, you can start gathering the necessary materials and tools. For building a duck boat, you'll need:
- Plywood: Marine-grade plywood is ideal for its resistance to moisture and rot.
- Aluminum or Fiberglass: Choose based on your budget and desired durability.
- Epoxy resin and fiberglass cloth: For bonding and sealing the hull.
- Wood screws, nails, and adhesives: For construction.
- Power tools: Jigsaw, drill, sander, and a circular saw.
- Hand tools: Hammer, screwdrivers, measuring tape, and clamps.
Construction Process
With your materials and tools ready, you can begin constructing your duck boat. Follow these steps:
Frame Construction
Build a strong frame using marine-grade plywood and wood supports. This frame will provide the foundation for your hull and determine its shape.
Hull Construction
Attach plywood or aluminum sheets to the frame to create the hull. If using aluminum, you'll need to bend and shape the sheets to fit the frame. Use epoxy resin and fiberglass cloth to seal the hull and add strength.
Finishing Touches
Once the hull is complete, add the finishing touches, such as seats, storage compartments, rod holders, and any other desired features. You can paint the boat with a durable marine paint to protect it from the elements.
Customization and Comfort
The beauty of building your own duck boat lies in the ability to customize it to your liking. Here are some comfort-enhancing features you can incorporate:
- Comfortable Seats: Consider high-back seats with cushions for maximum support and comfort.
- Storage Compartments: Build in compartments for tackle, bait, and other essential gear.
- Rod Holders: Install multiple rod holders to keep your rods within reach and organized.
- Footrest: Add a footrest to elevate your legs and improve circulation.
- Sunshade: Install a canopy or sunshade for protection from the elements.
Safety Considerations
Safety is paramount when boating. Ensure you have the following:
- Personal flotation devices (PFDs): Required for every person on board.
- Navigation lights: Required for nighttime boating.
- Fire extinguisher: Essential for emergencies.
- First aid kit: For minor injuries.
- Emergency contact information: Keep it readily accessible.
Building your own duck boat offers an unparalleled sense of satisfaction and allows you to create a personalized fishing platform perfectly suited to your needs. Follow these steps, prioritize comfort and safety, and get ready to enjoy endless adventures on the water.